Notes & Troubleshooting
-
it is Highly recommended to upgrade your Firebase Plan to Blaze plan if you have a big number of users . since the Free Plan is Limited. you can see the limits and pricing from here
-
if you have installed the application and there are no contacts are shown even if you have registered contacts, then you have to make sure that you have deployed Cloud Functions
, after doing that go to Firebase Console > Authentication > Users > and delete all users. next up you should uninstall the app on your devices and reinstall it again. you need to do this only once since you did not deploy Cloud functions before registering your users in the app. -
Real Phone numbers will not work on any Emulator,it's Firebase limitation, if you want to test it on emulators you have to Add Testing Numbers
-
if you have problems when verifying phone number and you are in 'debug' mode,then you have to add your debug SHA1 Fingerprint. by going to
Generate SHA1 Fingerprint Tool/OS Type(64 or x86)and run the filedebug.batit will ask you for password enter:androidthen you have to copy the SHA1 Fingerprint and paste in Firebase Console. like here -
if you face a problem when verifying Phone Number 'unknown error occured' make sure that you have added your SHA1 Fingerprint here
-
if you have issues when deploying or installing npm dependencies please wait for a minute and try again , also try to close the Anti-Virus on your computer since it may block the non-SSL URL's.
-
you may see some 'warnings' while building your app on Android Studio, please ignore them as they are just warnings and NOT 'errors' , so they have no effect on your app.
-
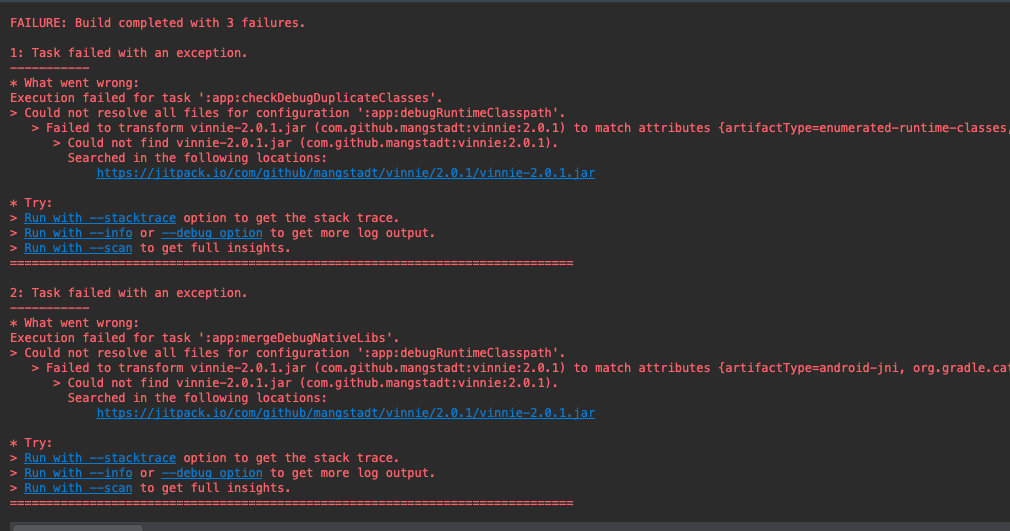
If you got an error while building the project as the image

go to build.gradle(app) and replace this line
implementation 'com.googlecode.ez-vcard:ez-vcard:0.10.3'
with
implementation 'com.googlecode.ez-vcard:ez-vcard:0.12.0'
then click on Sync now
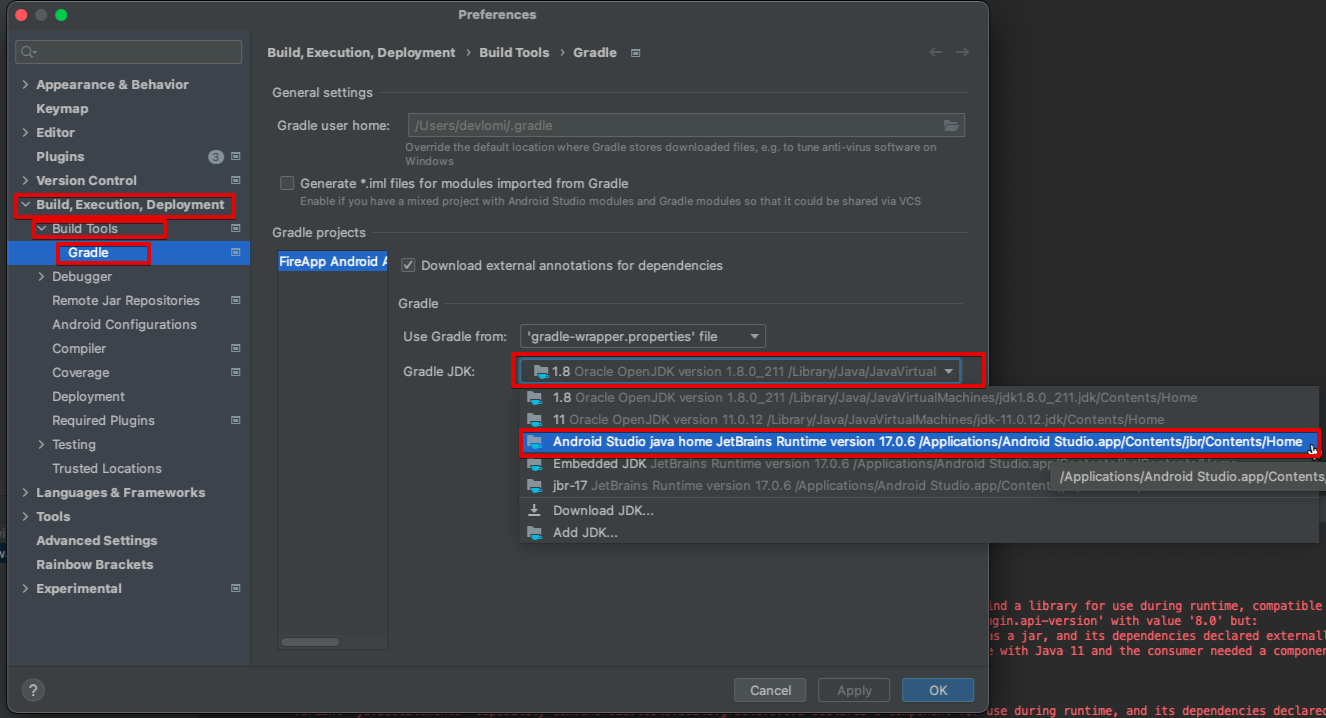
- If you had build issues regarding 'Java JDK', please make sure to set the JDK version.
You can do that by going to Settings > Build, Execution, Deployment > Build Tools > Gradle > and choose Android Studio java home.

- If you still have SHA-1 Issues and you already added your SHA-1 using
keytooland Google Play Console, you might want to try this:
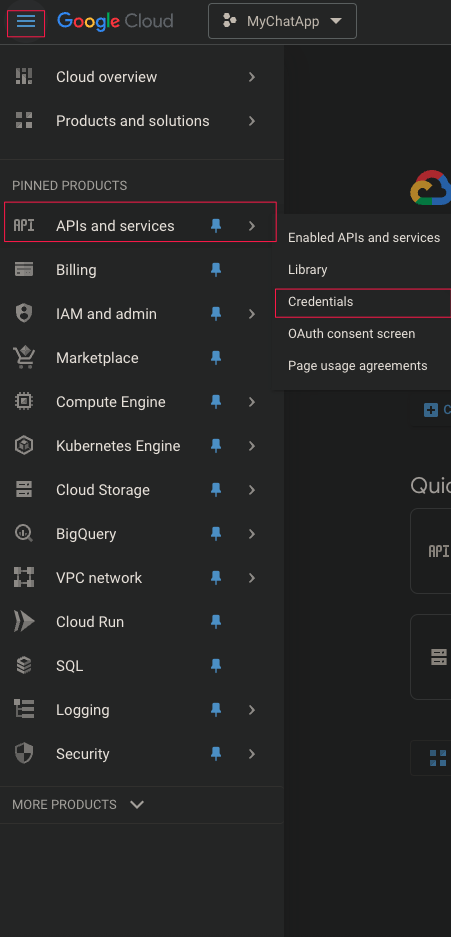
Go to Google Cloud Console > Choose your project > API & Services > Credentials

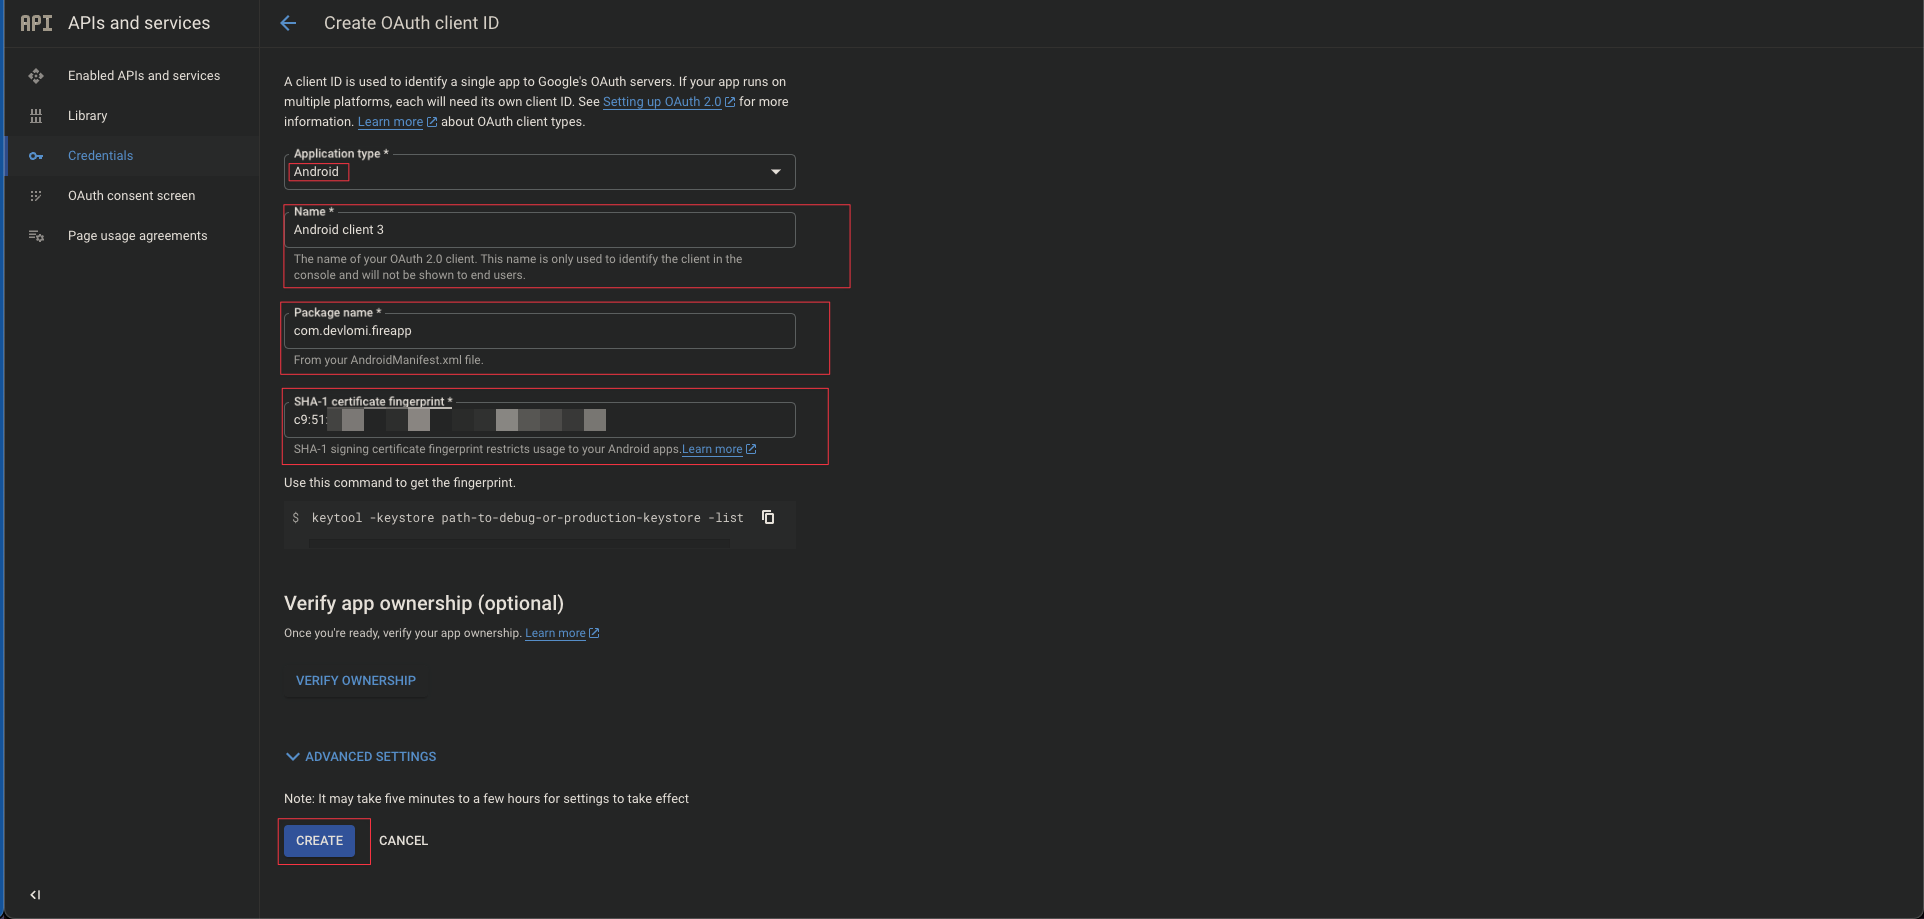
Create Credentials > OAuth2.0 client ID

*If this is the first time, it may show 'Configure Consent Screen', configure it by entering your email and the required info.
Next you have to add your app Info like name, package name, and your SHA-1
Please note that the package name should be your applicationId from your build.gradle.
Add your Release SHA-1 that you've got from keytool then click create.

Make sure to create another key with the same info but this time with the SHA-1 from Google Play Console.
Now you have to go to Firebase Console and download your 'google-services.json' file as it has changed, then add it inside your app folder.
make sure to clean the Android Studio Project after doing that to remove the old cached google-services.json file.