Setup & Importing Android Studio Project
- What Android Studio version is needed?
- How to open the project in Android Studio?
- How to change the package name?
- How to change the app name?
- How to enable/disable Ad?
- How to Configure Encryption?
- How to change group link domain?
- How to change Links in About Page?
- How to add more stickers?
- How to change app icon?
What Android Studio version is needed?
Latest Android Studio version is recommended, which can be downloaded from here
How to open the project in Android Studio?
- Open Android Studio > Open an existing Android Studio Project >Choose the folder
FireApp - Android App> OK - wait for 'gradle build' to finish
- Then go to 'Build' Menu and choose Clean Project
{primary} after build finishes you will get an error
google-services.jsonis missing ,to solve this you have to Setup Firebase after changing Package Name
How to change the package name?
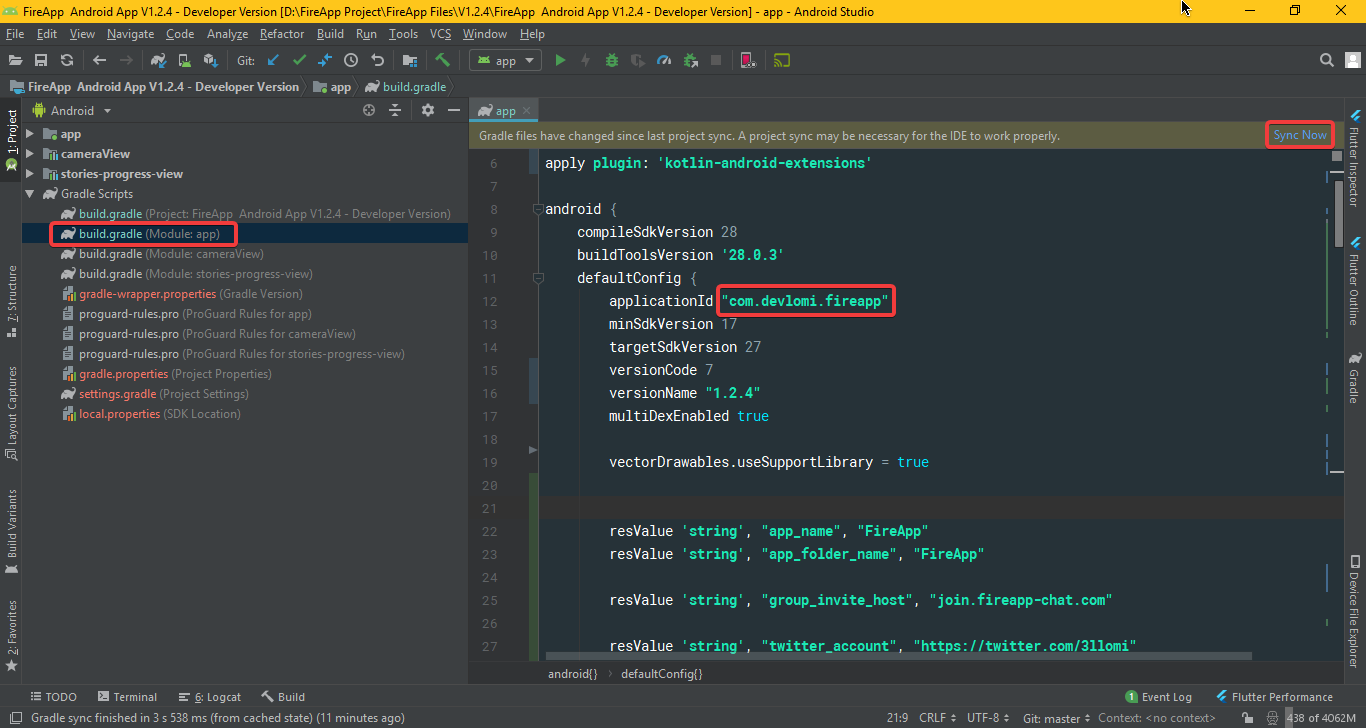
go to build.gradle and change applicationId value then click 'Sync Now' at the top
How to change app name?
go to build.gradle and change app_name value, also you might want to change app_folder_name value to change the actual folder name in the Phone then click 'Sync Now' at the top
How to Configure Encryption?
there are 2 Types of Encryption supported in the App
- AES Encryption:
go to build.gradle and change encryption_type value to AES hen click 'Sync Now' at the top
now go to src/main/java/com/devlomi/fireapp/utils/enc/aes/AESCrypto.java and change the KEY value to a unique and strong key. this will be used to Encrypt ALL messages so make sure to NOT share it with anyone.
- End-to-End Encryption:
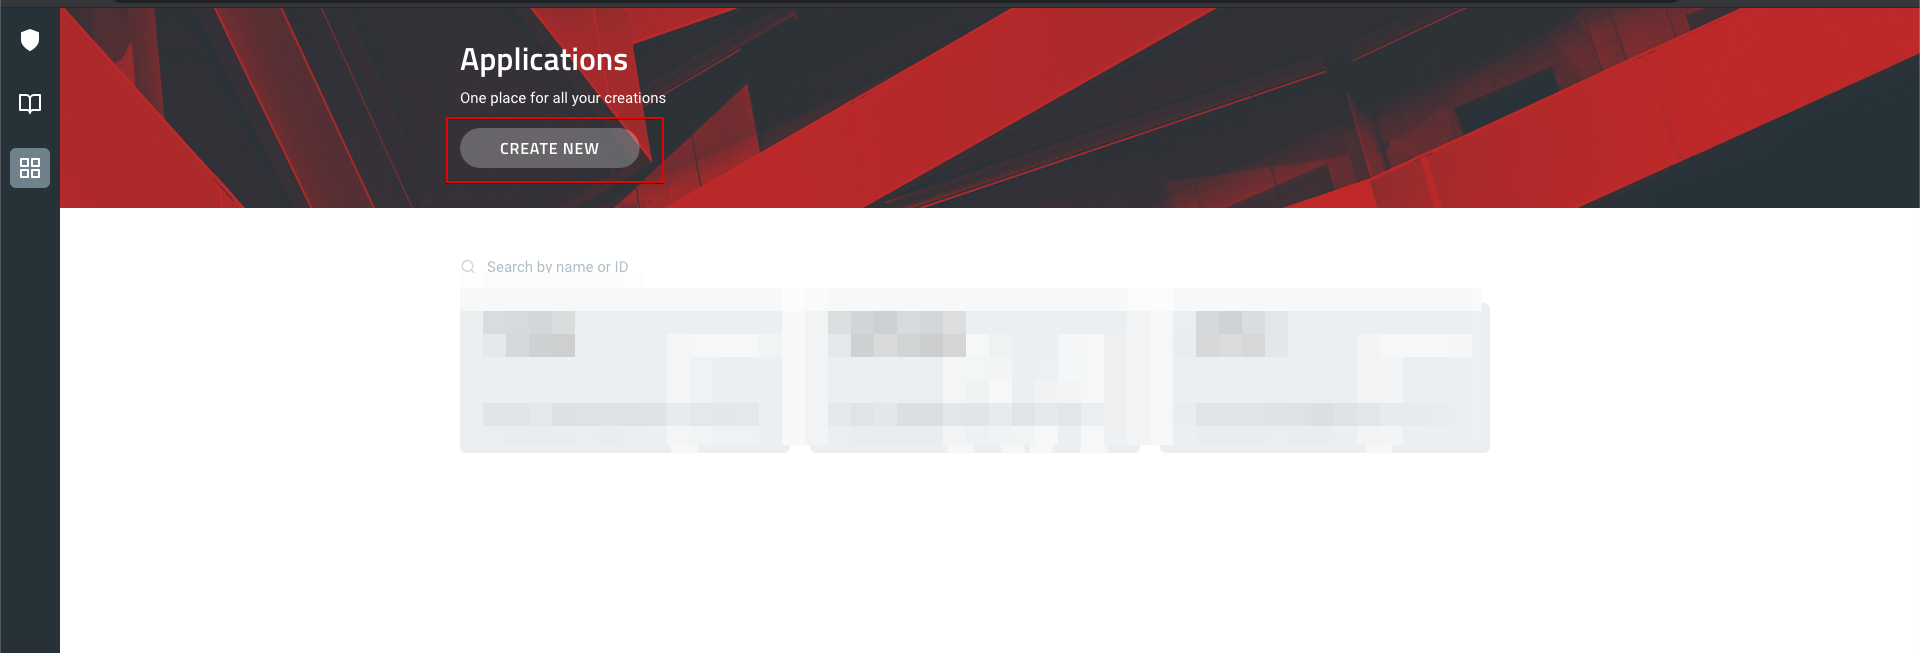
we are using Virgil's E3 Kit SDK to achieve End to End Encryption, so to use it in your app you have to register for a new account by going to their website . after creating a new account, create a new app
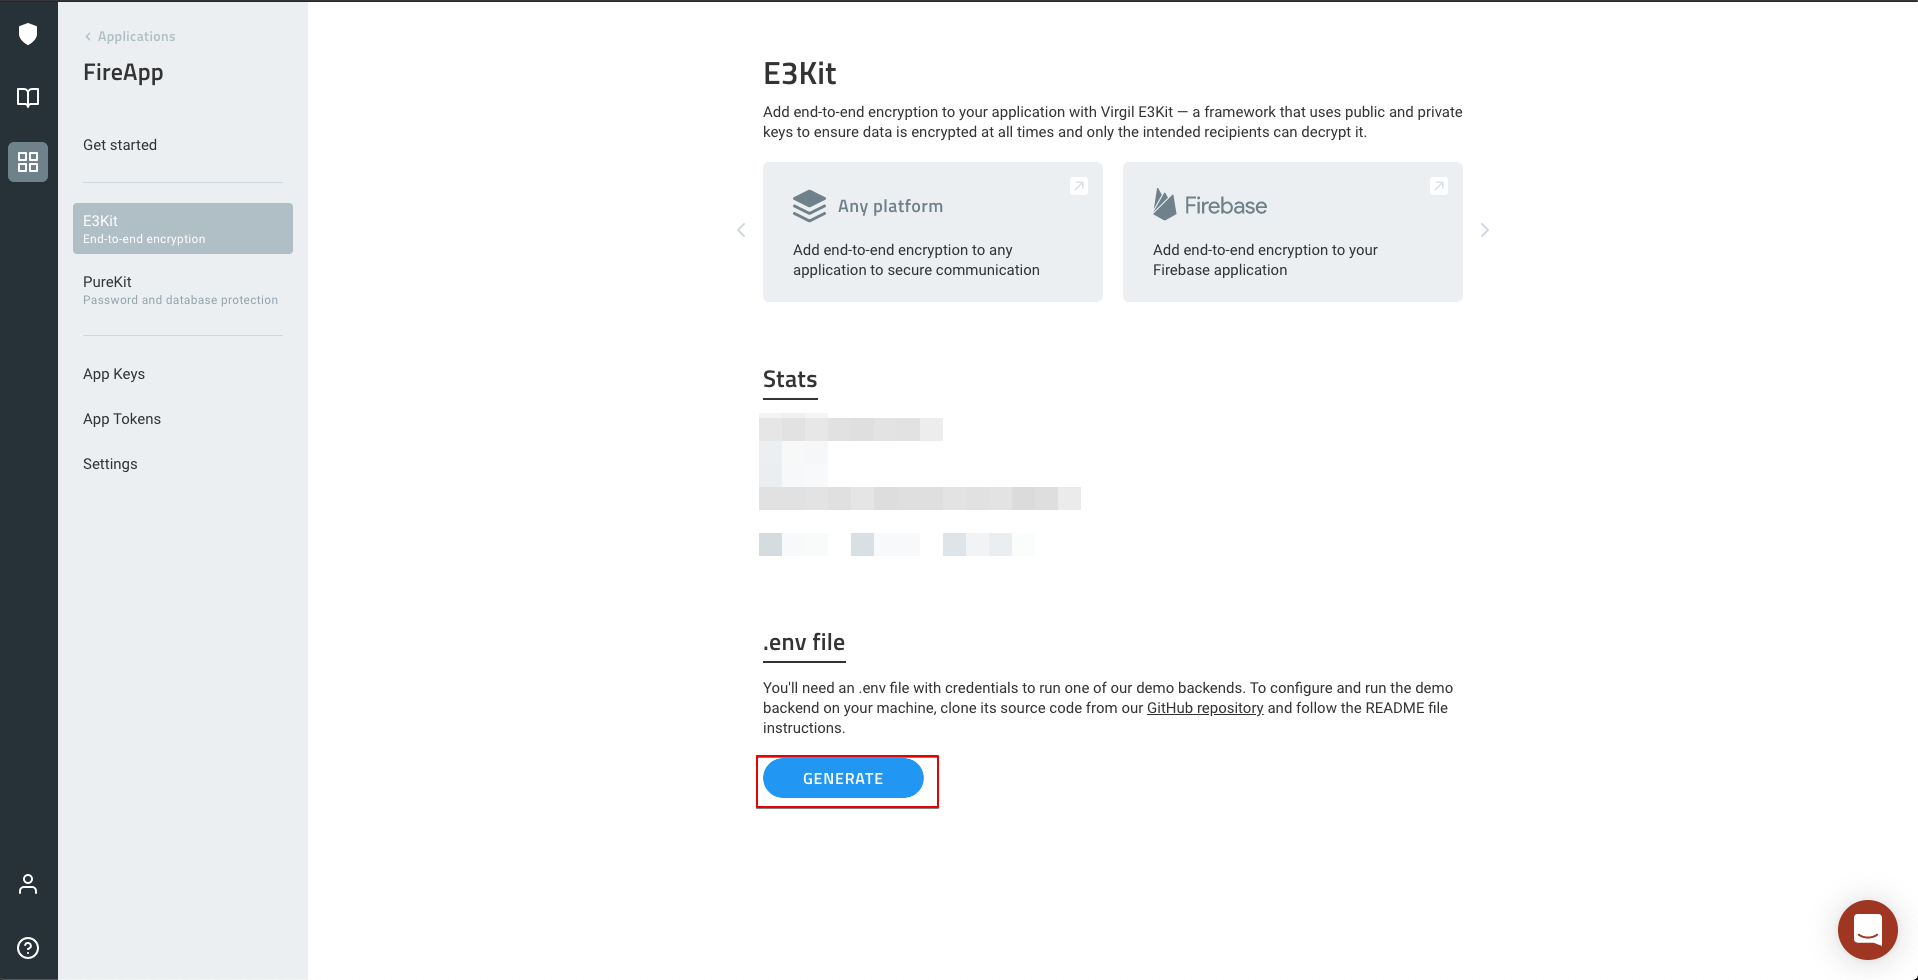
then go to E3Kit and generate your .env file
create a new key
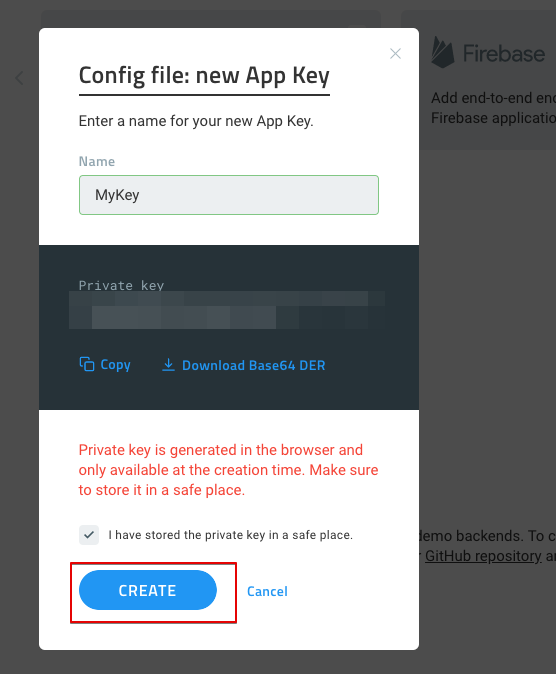
get your credentials, make sure to save them in a file or something, we will use it later.

now go to Backend - Cloud Functions/generate-virgil-jwt.js and open it in any text editor, then start pasting in the values that you've got from Vrigil's website accordingly.
lastly save the file and exit.
- if you don't need to use encryption at all, go to
build.gradleand changeencryption_typevalue toNONEhen click 'Sync Now' at the top
How to enable/disable Ad?
-
Enable Ads: go to
build.gradleand change the following value as you need."true"to enable and"false"to disable (with quotes)are_ads_enabledto enable/disable adsis_status_ad_enabledto enable/disable Ads in 'Status' Pageis_calls_ad_enabledto enable/disable Ads in 'Calls' Pageis_new_chat_ad_enabledto enable/disable Ads when you choosing a contact to chat withis_interstitial_ad_enabledto enable/disable Popup Ads when opening 'Chat' Page
-
Fill in the units IDs:
- copy you adMob AppId and paste it in
admob_app_id - create 2 Banner Units and one Interstitial Ad in AdMob and paste them individually in
banner_unit_id_new_chat,banner_unit_id_mainandinterstitial_ad_idlastly click 'Sync Now' at the top.
- copy you adMob AppId and paste it in
How to change group link domain?
you can do that by going to build.gradle and change group_invite_host value to your domain's website, then click 'Sync Now' at the top
example: join.fireapp-chat.com
Starting in FireApp V2.1.3 and Android 12, you should add the assetlinks.json to your server in order for the link to be opened in the app.
To do that, go to Firebase Console - Files > assetlinks.json and open it with any text editor.
Now replace the package name with your applicationId and add your SHA-256. You can follow this link to get your SHA-256. You can also add your Debug SHA-256 and Release SHA-256 so you can test it in Debug and Release modes.
After modifying the file, save it, then copy it and add it to your server/hosting at .well-known folder. (create the folder if not exists before)
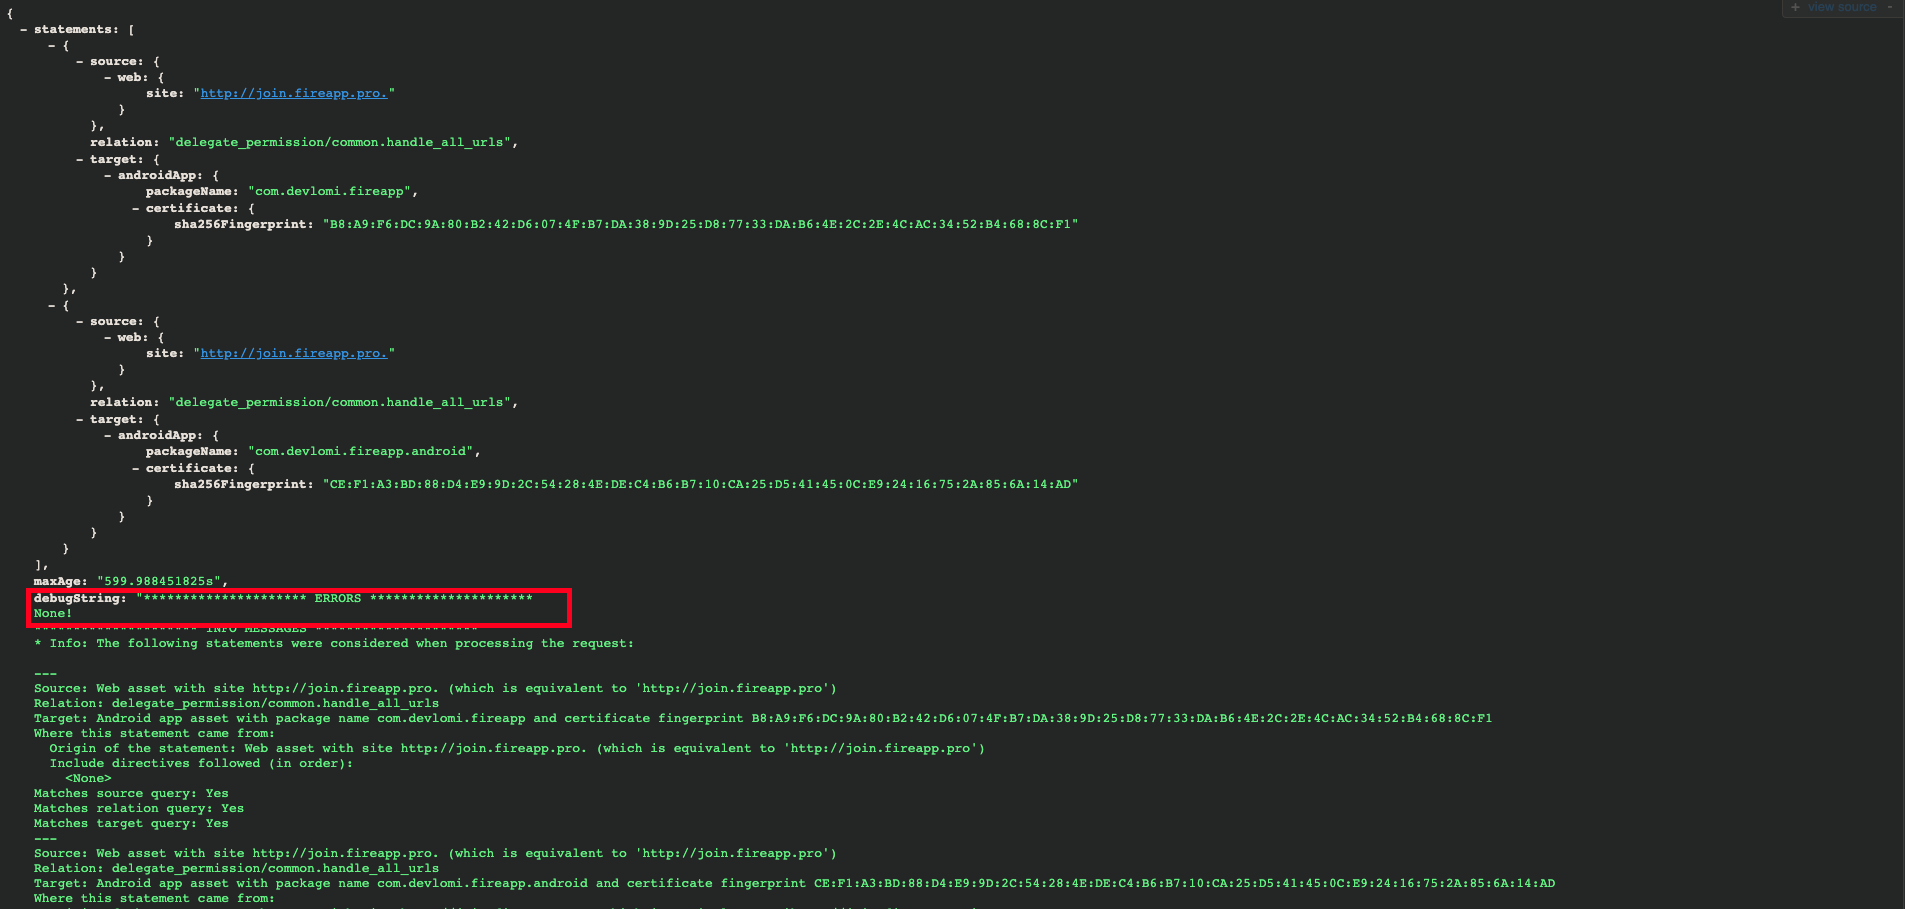
To verify it, you can use the link below (replace the website domain with yours)
https://digitalassetlinks.googleapis.com/v1/statements:list?source.web.site=http://your.website.domain&relation=delegate_permission/common.handle_all_urls
It should return something like this
How to change Links in About Page?
you can do that by going to build.gradle and change twitter_account , website , email values to what you want , then click 'Sync Now' at the top
How to add more stickers?
if you want to add your own stickers go to app\src\main\assets\stickers and paste all stickers images in this folder (should be in png or jpg)
How to change app icon?
in Android Studio on the left panel select app folder > right click > new > Image Asset > make sure Launcher Icons(Adaptive and Legacy) is selected choose your asset, adjust background color if needed > next > finish
![]()